
How to Post on Instagram From PC, MAC, Laptop, iPad and iPhone
Sharing posts on social media sites such as Instagram is an everyday activity that brands and individuals do to keep their accounts interesting and entertaining. While most of us use the app to share posts, sometimes we need to know how to post on Instagram from a PC, Mac, iPad and iPhone.
In this handy guide, we will show you how to do just that so you can get back to what you really want to do – be interesting on Instagram and enjoy the app.
How to Post on Instagram From PC, MAC, Laptop, iPad and iPhone
We will look at how to post on Instagram from the different options available to users, discussing each of them individually. There will be similarities as well as differences. We will be keeping things as simple and straightforward as possible and make it as easy as we can for you.
That way you can focus on what’s most important – the content itself.
How to Post on Instagram from PC

If you have an Instagram account for your business, you may find yourself needing to share content from the office, on your computer. This isn’t as straightforward as it is when you’re using the Instagram app.
Fortunately, it’s not impossible either and once you get the hang of it, it’s pretty easy.
Why share posts from a PC in the first place? Some brands prefer to take photos with DSLR cameras and then upload them. That can’t really be done on a different device without a lot of hassle and using your PC is the logical option.
We assume that you’re using Google Chrome on your PC but we will go into using alternatives as well.
Step 1. Log In
Open Instagram from your Google Chrome browser and log in to your account. From anywhere in the browser, right-click with your mouse to open a menu with settings. Select the ‘Inspect’ option which you’ll likely find at the bottom of the menu.
You can also press CTRL, SHIFT and i to open the code inspector tool. A window will appear on the right side of your screen but you can ignore most of it. (We do not recommend making any other changes here)

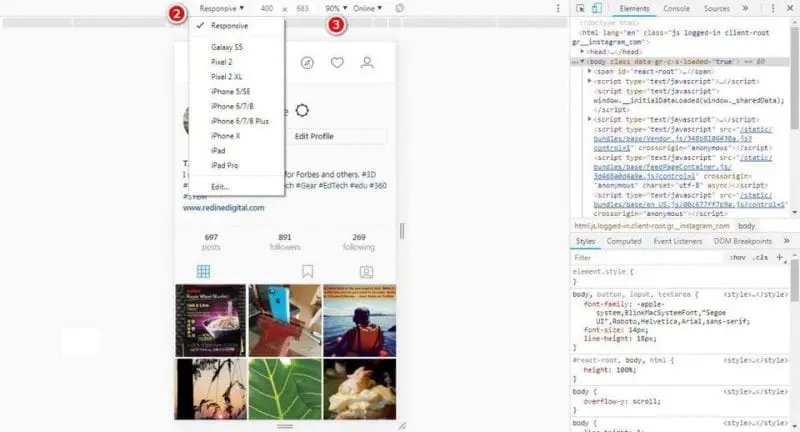
Step 2. Go To Settings
Search for a little icon that looks like a tablet and a phone, it should be at the top of the Code Inspector window.
Click on that icon and you will see the window change and you will notice that an option called ‘responsive’ is selected. You need to click on that and a drop-down menu will appear to show you different options.
Choose the option that is closest to your device. If you don’t see the best option at first glance, hit the ‘Edit’ option and you’ll be given an even longer list of options.
You can simply choose ‘Samsung Galaxy 5’ or a recent iPhone model if you want.
Step 3. Choose Display Size
Next, you’ll select what size you want the display to be. ‘Fit to Window’ is usually the best and most convenient option, but change it to whatever works best for you.
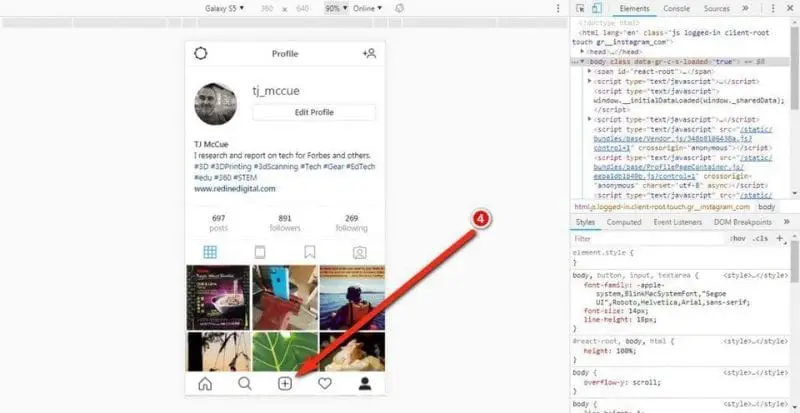
Step 4. Post
Your screen should now look like what you see when you’re using the Instagram app on a mobile device. This includes the + sign that means you can add photos or videos to your account. If you didn’t see the + immediately, try refreshing your browser. Press F5 or Fn and F5.
Now you’ll follow the usual steps to posting on Instagram and share the content you’ve got planned.
And that is how you post on Instagram right from your PC.
How to Post on Instagram from Mac

Unfortunately, despite the popularity of social networks such as Instagram and devices like the Mac, there is no official app to download.
However, users can head to Instagram’s login page with a Mac and they will have access to their account. This access is rather limited though as you can only browse through content and comment. You cannot download photos from Instagram. However, with SocialPlanner, you can download Instagram photos in just a couple of clicks!
It is also possible to watch Stories and send Direct Messages, though only for a few select users for now.
Just like the above-mentioned method, there is a way to trick the social media platform into thinking you’re on an app. That way, you can post on Instagram like you would when using a mobile device.
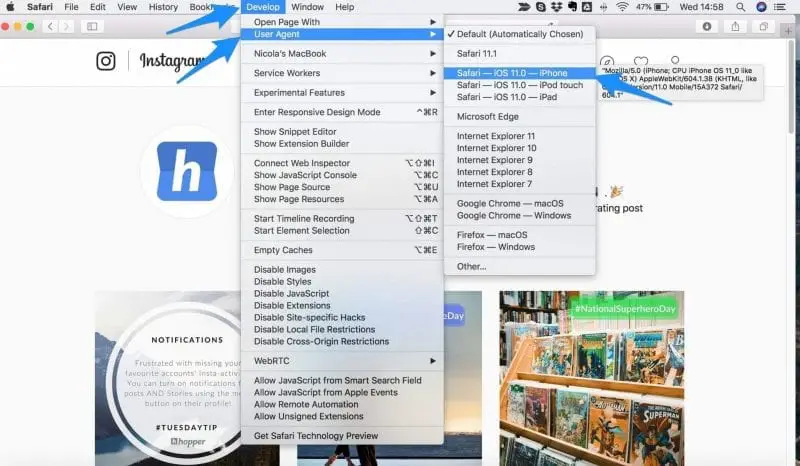
Step 1. Open Advanced Settings
Open Safari and go to your Advanced Settings via the ‘Preferences’ option. Ensure that ‘Show Develop Menu’ is toggled on in the Menu Bar.
Go to the Instagram website, log in to your Instagram account and select from the Menu Bar the Develop option. Then enter User Agent, followed by Safari -> iOS 12.1.3 -> iPhone. You don’t have to select that specific option, just go with whatever is the newest version of the iPhone.
The website should reload automatically but if it doesn’t, refresh the page yourself. The display should now be that of a mobile interface which will allow you to post to Instagram.
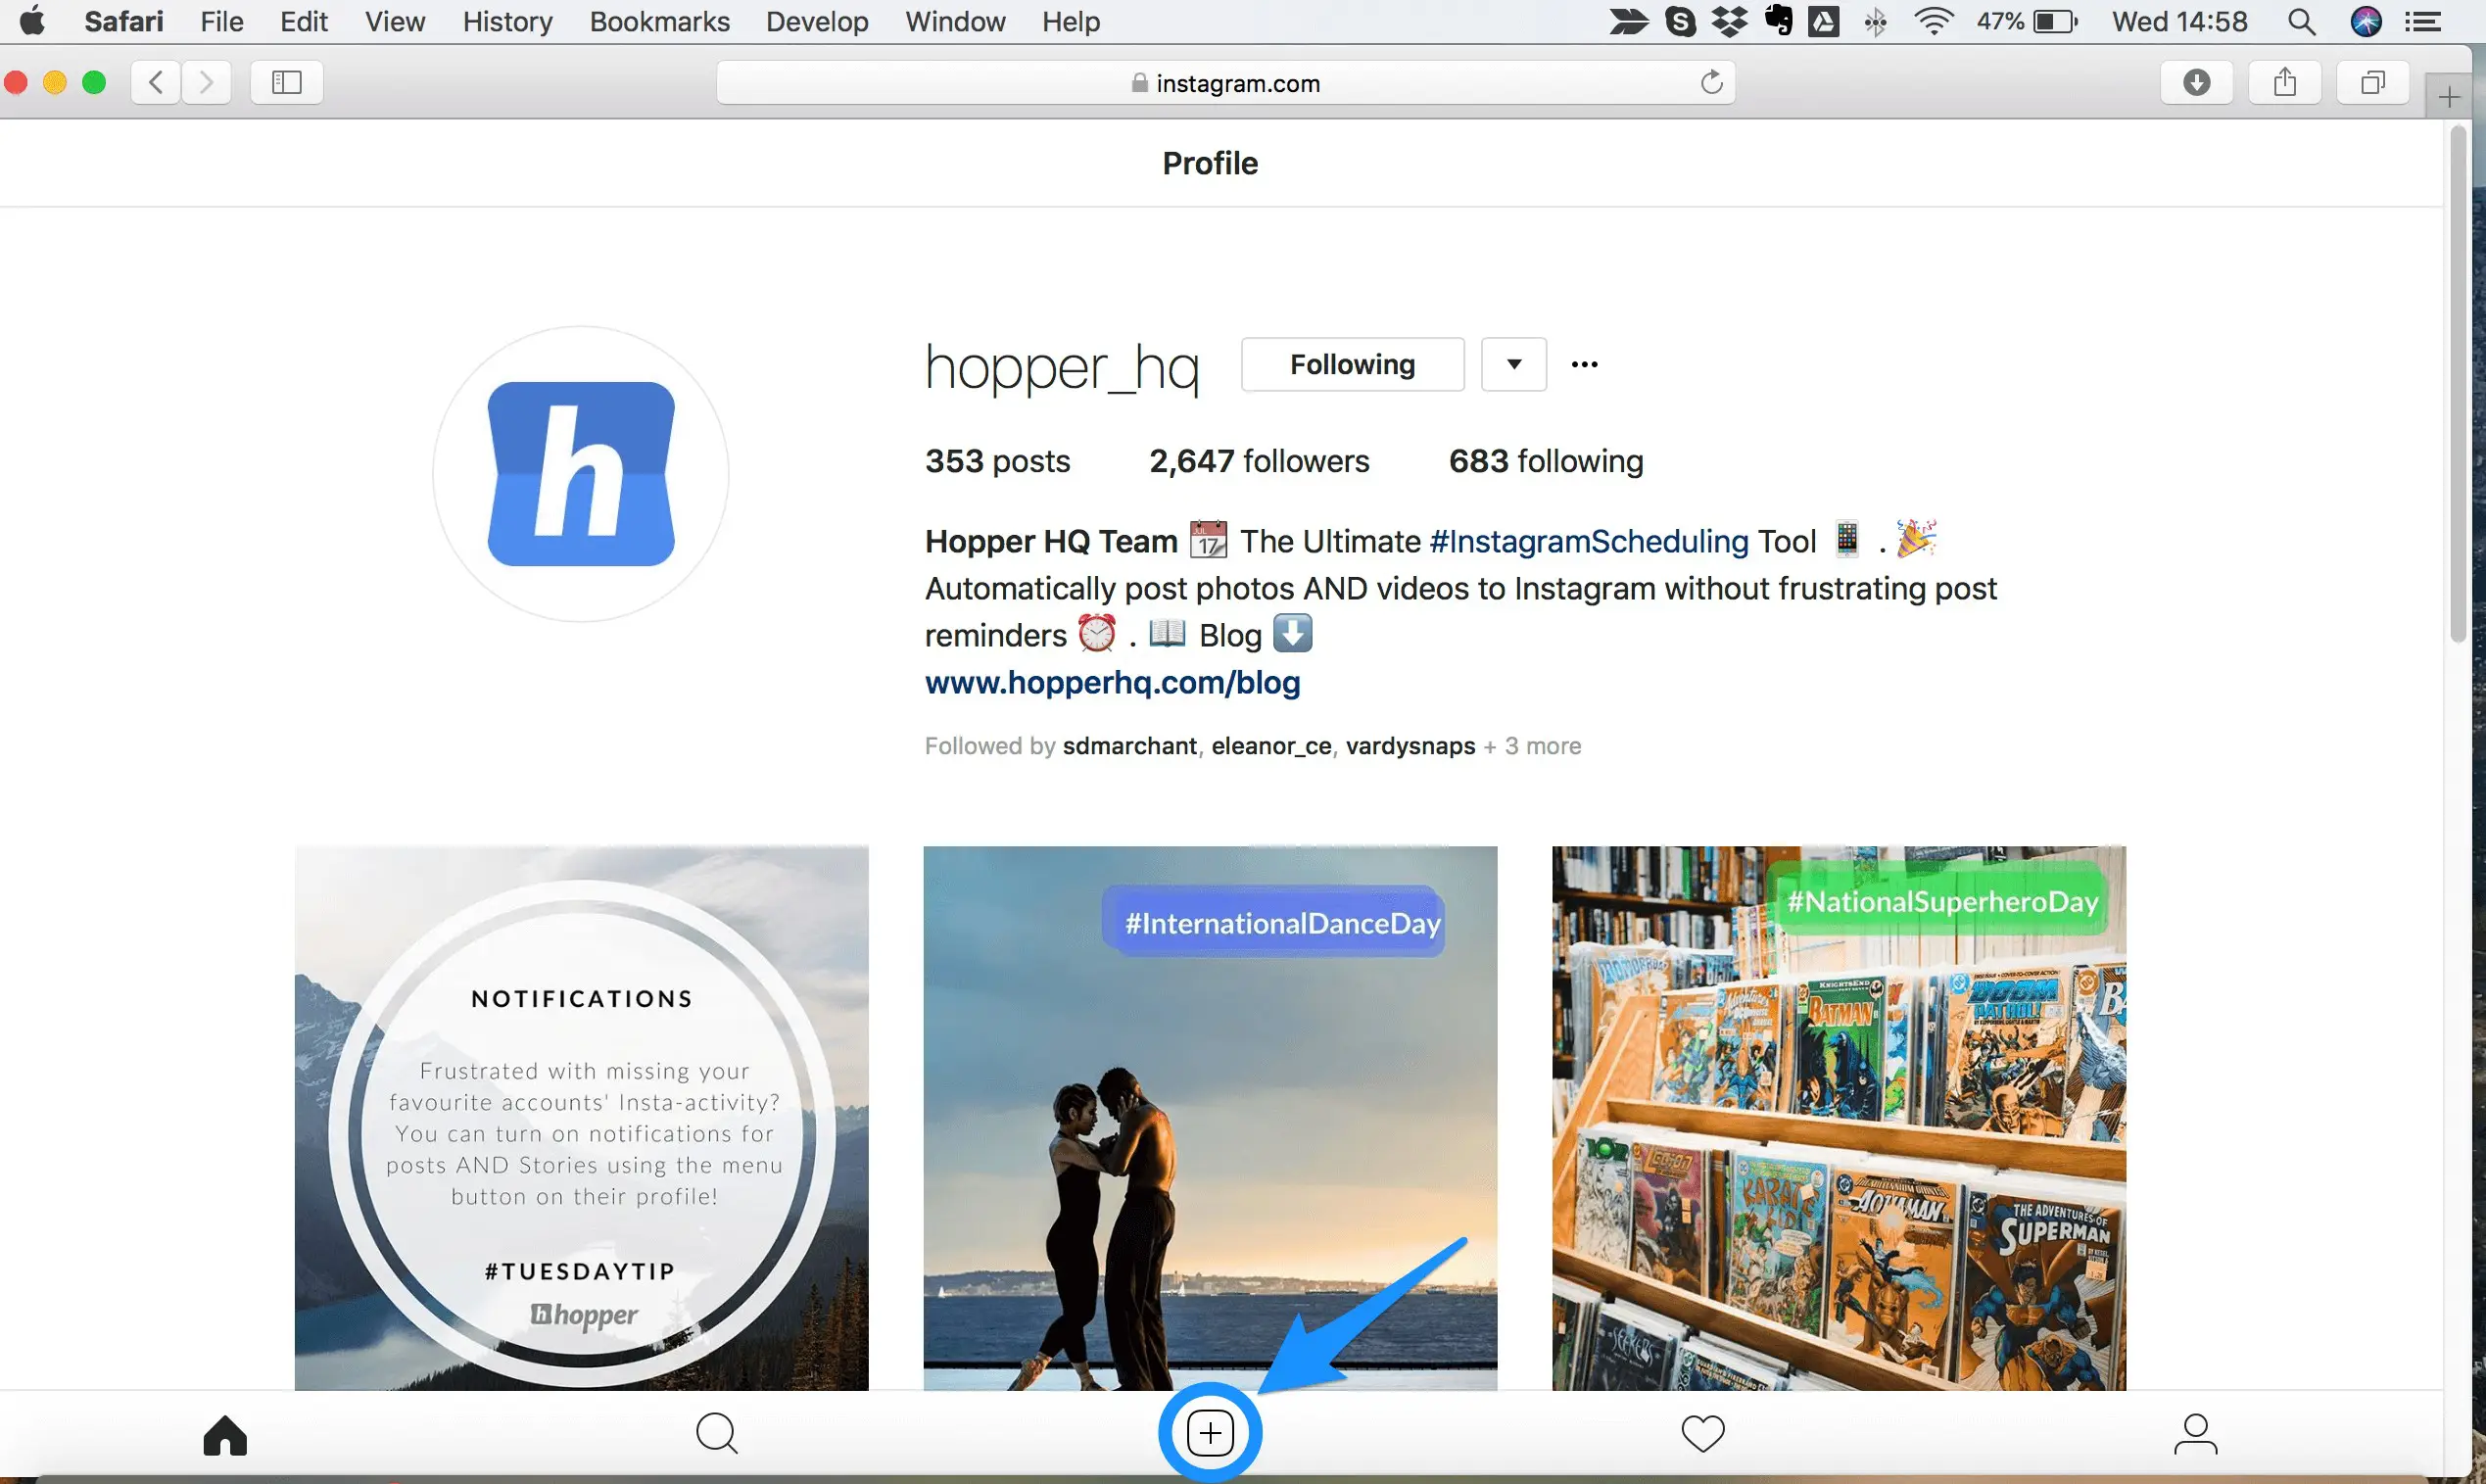
Step 2. Upload Photos
Now, you can start to upload photos to Instagram from your Mac. Simply tap the + icon and proceed as normal.
You will be able to edit your photo and add filters, captions and tags as you wish. Next, just hit ‘Share’ and that is it.
Step 3. Share
If you want to share Instagram Stories you can do that by selecting the ‘Your Story’ icon that you’ll find in the top left of your screen.
Select the image that you want to share and double-click on it. You will be given a preview as well as possibly asked to share your location. After that, you can add stamps or even draw on your image.
Adding text to your Instagram Stories is also possible and can add a little ‘something special’ if you feel like it.
When you are satisfied you can post your Story.
This method of posting on Instagram does not allow you to upload videos. Also, posting landscape images doesn’t work so well because they get cropped.
How to Post on Instagram on Laptop

Many social media sites are easily accessible from your laptop, but you don’t get all the features that you do when you use the Instagram app.
You can comment on photos and browse the many Instagram accounts that you follow. But you can’t upload photos or share new content.
Fortunately, there are ways to work around this that will let you post on your profile from the convenience of your office or home laptop/desktop.
We will be looking at the various tools at your disposal that makes it possible to post on Instagram and upload photos even when you’re not using a mobile device.
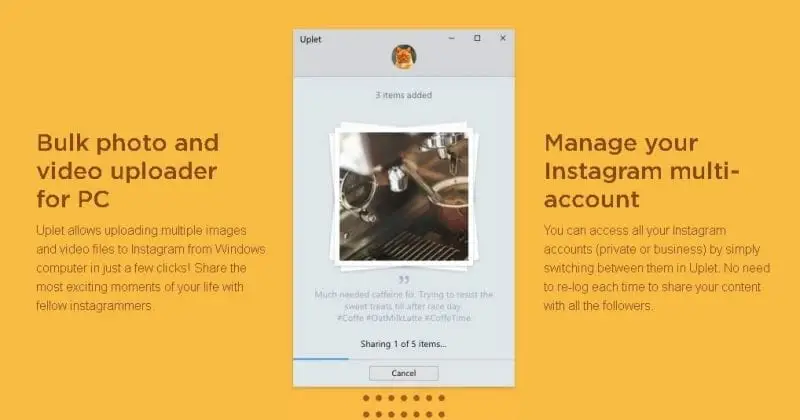
Uplet
If you’re using a Mac laptop, Uplet Instagram Uploader is a great tool. It is a third-party paid app that you can purchase at the Mac App Store. It isn’t yet available for Windows but will soon be.
To use Uplet, you simply have to work with its drop panel. You drop photos into it and fill out captions. After that, you hit ‘Send’ and you are uploading photos to Instagram. However, it does not allow you to add filters or use other advanced features.
A bonus of using Uplet is that it allows you to work with more than one Instagram account. This is a useful tool for social media marketers who use Instagram to promote multiple brands.
This is one of the best tools if you’re using a Mac and need something simple and easy to use.
Deskgram
This desktop app is ideal for using Instagram on your laptop and PC. There are two versions of Deskgram that you can choose from. They give you access to different features.
You can choose the free version which lets you view Instagram and add comments. To be able to post on Instagram, you’ll need to use the Pro version, which costs you $2.99 a month.
Keep in mind that you cannot upload videos if you’re using Windows.

How to Post on Instagram on iPad
Many iPad users are understandably upset that Instagram isn’t available for them, at least not yet.
But don’t despair, there are three ways that you might be able to use Instagram on your iPad.
First Option – iPhone Instagram Download
You can download the Instagram app version that will allow you to do everything the app allows other users to do.
Simply search the App Store on your iPad and find ‘iPad only’ options of Instagram. You will have to make sure that you don’t get confused by copycat versions. The real thing will have ‘Instagram Inc’ written below it.
Download the app and use it to share content on your Instagram account.
Second Option – Web View
This option sadly will not let you upload any content. If you need to stay up to date with what’s happening on Instagram, it will work well enough though.
This is as simple as opening your browser and signing in to your account.
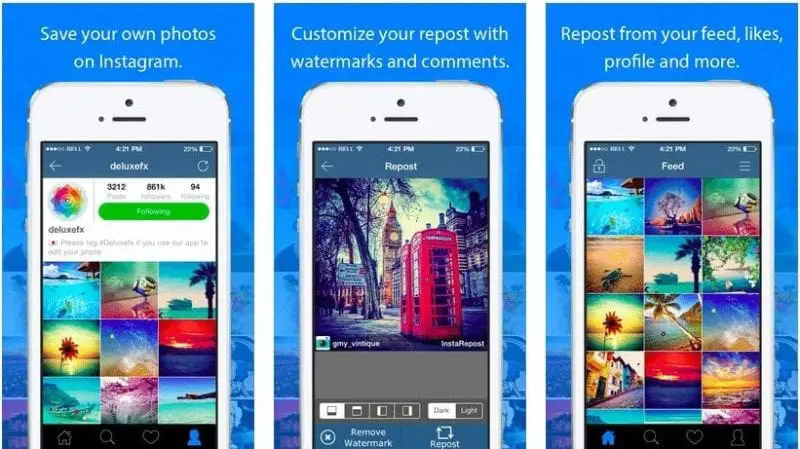
Third Option – InstaSave
You can use InstaSave to download and repost pictures and videos. It is a third-party app that is easy to use.
However, note that this is not an official Instagram app so be safe when using it. It does ask for your login details to help you get started on sharing content on Instagram.
How Do I Post to Instagram from Windows 10?
Using Instagram on Windows 10 on your desktop or laptop isn’t complicated. You can log in to your Instagram account and use the web version to browse through content and leave comments.
One important feature is missing though – you can’t upload content.
When using Instagram on Windows 10, you will see your feed the same as on your app. You’ll be able to Explore Instagram, view Notifications and take a look at your Profile. So you can still enjoy the social media platform if you weren’t planning on uploading new content.
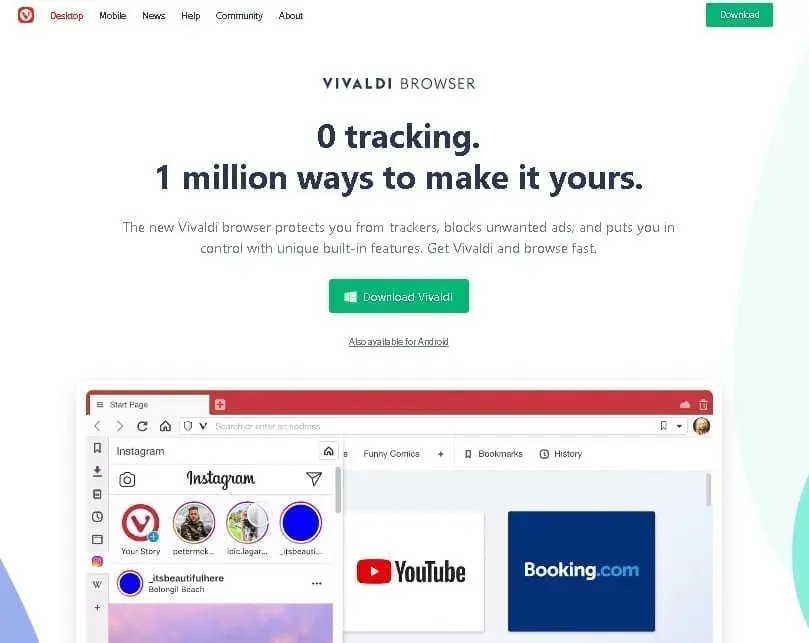
Fortunately, there is an app that can be downloaded from the Windows Store that will help you upload images on Windows. It is called Vivaldi and is quite popular.
Uploading Content To Instagram Using Vivaldi
Once you have installed Vivaldi, you simply head over to your Instagram account and log in. Then, select the + icon that should be on the left of your screen. You can now upload and share content to your heart’s desire.
You can also do the usual editing and adding of filters etc.
How to Post on Instagram From iPhone
Not sure exactly how to post on Instagram from your iPhone? We’ve got you covered. Here is an easy-to-follow guide that will have you sharing content in no time!
1. Log In
Once you’ve logged into your Instagram account, you should see your feed and the + icon that lets you share new content. It is usually found at the bottom centre of your screen.

2. Get Your Photo Ready
Select the photo or video that you want to share with your followers. You can also be spontaneous and take a photo or video and upload it.
Once you have decided on your photo or video, click Next.
3. Select Sizing
Now, you have to make sure that your image is the right size. You can share vertical, horizontal and square images. Although you’re not limited to square images, you still need to get the dimensions right for the best results.
For more on this, take a look at our guide on Social Media Image Sizes.
4. Apply a Filter
Once you’ve cropped your image, you can select a filter to apply to it. You get more than 20 filters to choose from. We suggest that all your posts have a similar filter – this improves brand awareness.
You can also adjust the image’s brightness, contrast and more. Then, select Next to move on to the following step.
5. Add the Caption
Now, you get to the fun part – writing your caption. Getting creative with your caption is highly recommended. You want to keep your followers interested and good captions are an easy way to do that.
You can even choose a fancy text for your captions to make them stand out even more. If you’re looking for more inspiration with fonts and text, be sure to take a look at our Instagram Fonts How-To Guide for tips and tricks!
6. Tag Friends
Once you’ve created a post that you are proud of, you can add friends to tag. Remember, Instagram expects that the people you tag were actually involved in the image.
Select Tag People to add your friends to your posts and you can also add them with the @ symbol.
That is all you have to do – now just select the Share option.
You can also add your location, play with emojis and share your posts on other social media platforms.
Auto-Posting on Instagram Using SocialPlanner

If none of these ideas appeals to you, you could also consider using a social media scheduling tool.
SocialPlanner.io is one of the best social media planner and scheduling tools available in 2020.
There are numerous benefits associated with using a planner. The most relevant one here is that you can schedule posts from your PC or laptop with zero hassles.
You don’t have to use your mobile device to upload content to Instagram. Here are some of the other benefits you can expect to enjoy when using SocialPlanner.io:
If you’re running a business or working on social media marketing campaigns, you don’t always have a lot of time for managing social media accounts. This includes searching for good content, making sure it’s good enough for your brand and then sharing it.
With the help of SocialPlanner.io, you can schedule ahead and make sure your accounts are consistently sharing fresh and interesting content. SocialPlanner.io also offers the ability to find red hot content on your behalf, making your job even easier.
By using SocialPlanner.io, you have the freedom and flexibility to roam and to mix social media management with other tasks without elevating stress levels or workload.
It is easier to find top-performing content, compose posts and share them whenever you want to, and it’s all automated.
It’s important for good marketers to have their target market in mind at all times. Instead of posting at a time when you have a minute between meetings or trying to get a post sorted before you sign off for the day, you can focus on choosing times that are going to have the most impact.