How To Use Facebook – A Basic Facebook Guide (2023)
Here’s How To Use Facebook – The Basics
Facebook is widely considered as the most popular social network and its popularity isn’t likely to diminish any time soon. Actually, Facebook is the third most visited site in the world after Google and YouTube. Even privacy breaches can’t bring this giant down.
So, if you want to get started on Facebook and enjoy the social benefits it offers, we have you covered. In this in-depth Facebook guide, we will show you exactly how to get started and make the most of Facebook in easy-to-understand step-by-step instructions.
Here are the Facebook basics every marketer should know. Once you’re done here, you will know more about status updates, Facebook friends, photos and videos and more.
Sign Up to Facebook
The very first step is to sign up for a Facebook account and it’s pretty simple. The platform makes it easy to get started.
Head over to Facebook’s homepage and fill in the required fields. You will be asked to provide your first and last names, your email address or mobile number, gender and birthdate.
You will also be asked to choose a password for your account.
Set Up Your Privacy
One of the most important basics of Facebook is staying secure. Once you’ve created your new profile, you can make changes to your privacy settings. This will control who can view your profile and information you share.
To edit these settings, click on the ‘Settings’ options.
Then, click on the ‘Privacy’ option and make your changes as you see fit. You can also control how other people can find you and make contact with you on Facebook.
Personalise Your Profile
This is one of the more fun Facebook basics that need to be known. It gives you a shot at being creative.
The chances that you share a name with someone else on Facebook are very high. That’s why you should personalise your profile.
When you’ve got a personalised profile, your friends and family will find you without much effort.
You can add a profile picture, cover photo and personal info such as where you’re living and your hobbies.
Update Your Profile
If you want to update your profile for any reason later on. Simply go to the ‘About’ section of your profile. Once there, you can fill in more details about yourself. You can add your education, job title and more.
Having a well detailed profile will make it easier for your Facebook friends and audience to find you.
Choose a Profile Picture
To select a profile picture, you can choose a photo that you’ve been tagged in on Facebook or one you’ve already uploaded.
You can also choose a new one you just took on your phone and add a frame to your chosen photo. When it comes to Facebook basics, this one shouldn’t be neglected. The image you select will be associated with your brand, so make it a good one.
Choose a Cover Photo
You can select your cover photo in the same way as you chose your profile picture. Getting your pictures to look right can take some experimentation. Check out our social media image size guide for a more detailed guide on getting image sizes correct.
Facebook Timeline
Your timeline on Facebook is a ‘log’ of your activity in backwards-chronological order. You will be able to see your uploaded media and status updates on your timeline.
Also, the photos that you were tagged in by your friends will also show up here.
Public Pages
It is possible for Facebook users to follow public pages and get updates about their activity. These pages can be celebrities, bands, sports teams and other public figures.
You can search for your favourite singers, shows and movies and follow them. Just a word of caution: make sure that the page is verified. Many fans create fake accounts of public figures and you could be following the wrong page if you don’t check.
Once you follow a page, you will see their updates in your Facebook news feed.
Posting

This is one of the many fun features of Facebook – posting content you want to share with your friends and family.
You can keep everyone updated on what’s going on in your life.
To share a Facebook status, use the text box that is located at the top of your feed or profile page.
You can share text with different coloured backgrounds, stickers, videos, photos and even links here.
It is also possible to share activities and feelings. In addition, you can ‘Check In’ to let everyone know where you’re dining or spending your holiday.
Facebook allows you to tag your friends if you’ve spent time together. You can also tag events if you’re having fun at big events.
Facebook Basics – Friends
The whole point of Facebook is to connect with your friends, no matter where they are. There’s more than one way that you can add your friends. You can do a search for them, import your email (or phone and iCloud) contact list or use the ‘Find Friends’ tab.
To use the latter option, select the ‘Find Friends’ option. You will see a list of people who could be your friends. This is based on information such as your location and friends you’ve already added.
Other Features
Recommendations – You can ask people on Facebook for advice on just about anything.
Nonprofit support – Select an organisation that you want to support and share it on your status. Your Facebook friends can donate to the organisation.
Questions – Facebook allows you to ask questions and give answers to other users’ questions.
Facebook Stories – You can share all your content in a Facebook story. You can also watch the shows shared by your friends. Take a look at this article for more information on Facebook Stories.
Lists – You can create your own themed lists to share with your friends.
Videos And Photos
Facebook lets users share all kinds of content such as photos and videos. You can also share live broadcasts and albums.
To upload, you can head to your profile, select the ‘Photos’ tab and choose ‘Add Photo/Video’. This lets you upload media from your computer.
You can also create albums with photos and videos by choosing the ‘Create Album’ option. Then, select the media you want to add to your albums. Although this is one of the many Facebook basics you can play around with, be sure to keep quality in mind.
You should never share media content that isn’t of the best possible quality.
Newsfeed
Your newsfeed is unique to your own page. You will see posts from your friends and liked pages that Facebook thinks you’ll like. Also, you will see ads from brands that you might be supporting or using.
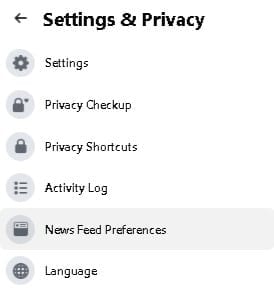
You can change how your feed looks by managing your preferences. Select the ‘Settings’ menu and go to the ‘News Feed Preference’ option. You can choose whose content you see first and more.
Facebook Basics – Going Live

This is a neat feature that allows users to share live broadcasts with their friends. You simply have to select the ‘Live Video’ option from the ‘What’s on your mind?’ button.
Once select this option, you can write your description for your broadcast, add a feeling or activity and tag people. You can also add a poll and support a non-profit organisation.
Once you’ve finished describing your broadcast, simply press ‘Go Live’ and you’re recording.
Some Facebook users like to stream their gaming sessions or even musical performances.
Connecting On Facebook
Now we get to the more detailed Facebook basics…
Since this platform is big on connecting with other people, there are several ways in which you can do that.
You can see updates from Facebook friends on your timeline and interact with them. Facebook lets you react to posts and comment on them.
You can also share the posts that you like most. If you feel like it, you can share posts and other content on your friend’s timelines too.
The famous ‘like’ thumbs-up of Facebook is one way to show that you appreciate a post. You can also ‘love’ a post, laugh at it, show anger, amazement or sadness and care.
Facebook Status
No Facebook tutorial or guide would be complete without telling you about status updates. These are the most common type of posts on the platform.
You can update your status by typing in the box that asks ‘What’s on your mind?’ and many Facebook users see it as a quick way to let everyone know what’s up in their lives.
Status updates are short and quick and can sometimes even be vague. Many Facebook users like to share inspiring quotes this way.
You may think that status updates are pretty unimportant but they reveal a lot about a person. You can use them to show everyone how creative you are or even start conversations with your Facebook friends.
Facebook Basics – Messenger
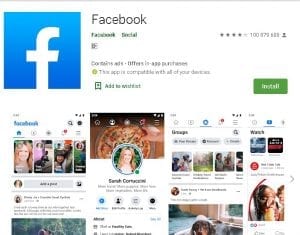
This is Facebook’s chat feature and is all about sending messages to other users. It is possible to download the app too, if you need to stay in contact with your friends while not using Facebook itself.
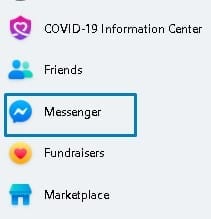
To send a message using Messenger, click on the ‘Messages’ button on any page you’re currently or head ‘Home’ and click on the Messenger icon.
You can create group chats to involve a handful of people by selecting the ‘New Group’ option. The name of the group is up to you, as well as the members who will form part of it.
Sharing pictures, stickers, emojis, GIFs and videos is possible when sending messages on Facebook.
Facebook Messenger Calls
Facebook also lets you make voice and video calls from Messenger. This can be great for meeting with colleagues or prospective clients and partners. Keep in mind that you need to be professional at all times, even on a social media platform that feels casual. That’s Facebook basics 101!
Other Facebook Features
There are more features available on the popular platform hat will entertain users. You can keep an eye on the ‘Events’ page – it shows events that are popular with your friends. It also shows events that were organised by groups that you are a part of.
You can also find easy access to the Groups you manage and are part of. There, you will find suggestions for groups that Facebook thinks you might enjoy.
Facebook Games
Facebook offers a very big collection of games that are very popular. Some of them are for solo-playing but many of them can be played with friends. We don’t recommend that you spend too much time on this feature.
Facebook Marketplace

If you’re looking to buy and sell items locally, you might consider making use of Facebook’s Marketplace.
Here, you can search for just about anything – from pet food to accommodation and vehicles for sale.
Now that you know the Facebook basics, let’s get into a more detailed discussion. We’ll be discussing how you can block people, how to delete groups and even how to delete Facebook, should you ever want to.
The marketplace is also a great way to support your friends on Facebook who are selling merchandise.
Facebook Basics – Changing Your Name
How To Change Your Name On Facebook
There are many reasons why Facebook users may want to change their names. Perhaps you don’t like the name you chose as a teen, or you got married. Maybe the name just doesn’t suit your Facebook profile and presence anymore.
Whatever the reason, Facebook allows you to make the necessary changes.
Just remember that you can only change your name a few times, so use your chances wisely. It is not completely clear how many times ‘a few times’ really is.
Keep in mind that you are not allowed to use pseudonyms names on Facebook, or any fake names.
Symbols and numbers are not accepted as a name on the platform either, and neither are inappropriate words, titles and inappropriate words. Remember that your Facebook friends will see your new name.
Also, Facebook doesn’t recognise certain characters and punctuation marks.
Right, now that you know what to avoid when you want to change your name, let’s get into how to change your Facebook name.
Step One
First, make sure you are logged into your account. Then, click the little down arrow icon at the top right of the page.
Then click on “Settings” to get to ‘General Account Settings’.
Step Two
Now, click on the ‘Edit’ option next to your name. You can then type in your desired names. Facebook will remind you that you can only choose a new name again in 60 days, so make sure you’ve got the spelling right.
You can also choose an alternate name.
Step Three
Once you are satisfied with the new name you have chosen, click ‘Review Change’, and enter your password.
This prevents sneaky friends from changing your name to something silly if you forget your Facebook page is open when they’re around.
Step Four
Now, select ‘Save Changes’. You will have to allow about a day for the change to take effect.
That’s it!
How do I change my name on the Facebook app?
If you can’t access Facebook on a desktop, you can still change your name using the app on your iPad, smartphone or tablet.
The process is fairly simple.
Step One
Open the Facebook app and log in to your account.
Step Two
Tap on the menu option (it should be at the top-right corner of your screen), which looks like three bars.
Step Three
Now, select the ‘Settings and Privacy’ menu option. Once you’re in the menu, head to ‘Account Settings’ and choose the ‘General’ option.
Step Four
You will find your personal details displayed now and you can manage it all from here. Tap on your name and you will see a ‘Change Name’ option.
Step Five
Make the changes to your names as you wish to. Remember to stick to the rules. You can also change your language-specific name here. A language-specific name is your Facebook name translated into another language.
Step Six
Once you’ve changed everything you want to, select ‘Review Change’ and select the display option that is relevant to you. Type your Facebook password to continue.
Step Seven
You can now select the ‘Save Changes’ option and then you’re done. It might take up to 24 hours before your name is adjusted though.
How Do You Change Your Name on Facebook on an iPhone?
If you can’t access Facebook on a desktop, you can still change your name using the app on your iPad, smartphone or tablet.
Initiating a name change on Facebook is relatively easy when doing so from your phone. Here are the steps.
Step One
Open the app and log in to your account, tap the bottom right hamburger icon, it should look like 3 horizontal lines.
Step Two
Next, scroll down to ‘Settings and Privacy‘, then tap ‘Settings’, then tap ‘Personal information’
Step Three
You will now find your account details and tap on your name to find the ‘Change Name‘ setting.
Step Four
Choose the new name that you wish to have displayed on your Facebook. Click ‘Save‘ and the changes will become permanent. Remember that it may take a day before you will notice your new name.
Why Can’t I Change My Name On Facebook?
If you’re having difficulty with changing your name or the name of your profile page, there could be a few reasons for this.
It could be that you’re not following Facebook’s name policy or you’ve changed your name in the last 60 days. Make sure that your name does not break any rules and that it doesn’t contain any symbols or letters.
Also, if you’re changing your name too frequently, Facebook will notice and put a stop to it. It’s also possible that your name doesn’t match the name that appears on an item from Facebook’s ID list.
Your Used ID is nothing more than a string of numbers that are connected to your profile. Whenever a new account is created, it gets assigned a new ID.
If you want, you can find out more about your user ID.
Once the platform notices that you’ve changed your name too often, you may have to wait 120 days before you try again.
Also, if you’re changing your name too frequently, Facebook will notice and put a stop to it. It’s also possible that your name doesn’t match the name that appears on an item from Facebook’s ID list. If none of the above answers your question, you can always contact Facebook.
There is a form you can fill out to request a name change.
Facebook Basics – How To Block or Unblock

How To Block Someone On Facebook
It is important to know how to block users because it is absolutely possible for someone to start making a nuisance of themselves.
It’s not at all difficult to block a Facebook user.
Step One
Go to the profile of the person you wish to block.
Step Two
Click on the three dots located below their cover image and select the ‘Block’ option. You will have to confirm that you want to block the user. Once this is done, the person won’t be able to see you or make contact.
How to Unblock Someone on Facebook
If you, for whatever reason, wish to unblock someone on Facebook, it is just as simple as blocking them is.
Step One
Head to your settings menu.
Step Two
Click on ‘Blocking’, which should be in the left-hand channel.
Step Three
Scroll down to ‘Blocked Users’ and you will see a list of the people you have blocked.
Step Four
Click on the ‘Unblock’ option next to the name of the person you want to unblock. Click ‘Confirm’.
Now the person will be able to contact you again and you will have to wait 48 hours before you will be able to block them again.
How To Block Someone On Messenger
While it is easy to block a user on Messenger, you should know that doing so won’t block them on Facebook as well.
Blocking someone on Facebook blocks them on Messenger as well but blocking a person on Messenger only blocks their messages and calls.
Step One
Open your Messenger app on your phone or tablet.
Step Two
Now, tap on your profile picture, which will open your profile details.
Step Three
Scroll to the ‘Preferences’ options and tap on ‘People’.
Step Four
Next, click on the ‘Blocked’ option and select ‘Add Someone’.
Step Five
Scroll through your Friend list and click on the name of the contact you want to block. You will be taken to a new page where you can tap on ‘Block on Messenger’. Confirm that you want to block the person and you’re done.
How To Unblock Someone On Messenger
If you’ve changed your mind about blocking someone on Messenger, it is easy to reverse the block.
Follow all the same steps as when blocking a user until you’ve entered the ‘Blocked’ option in the ‘People’ page.
You will now see a list of all the people you’ve blocked on Messenger. Tap on the ‘Unblock on Messenger’ option and choose the contact. A pop-up will ask you to confirm and then you’re done!
How Do You Unblock Someone on Facebook on Your Phone?
You can easily block a Facebook user if you’re on your phone.
Step One
Log into your Facebook account.
Step Two
From your News Feed, select the ‘More’ button that is in the top-right corner. Then head to the ‘Help and Settings’ section.
Step Three
Enter your ‘Account Settings’ and tap on the ‘Block’ category.
Step Four
From the list that appears, select the person that you want to unblock.
That is how you go about blocking and unblocking Facebook users from your account. Once you do, they won’t be able to see your status updates, profile page or personal information anymore.
Facebook Basics – Delete or Deactivate?

How to Delete a Facebook Account
If you think you have had enough of Facebook for some reason, you can delete your account. We will discuss how to delete Facebook as well as how to deactivate Facebook, in case you’re not sure you want to go that far.
Before deleting your Facebook account, think about it. Make sure that it is really what you want.
Facebook deletes accounts a few days after the initial request. If you decided to log in during that time, your account will not be deleted.
Once your account is deleted, you cannot get it back. However, it may take up to 90 days before all your stored data is deleted from backup systems.
If you’re unsure if you actually want to delete your Facebook account, consider just deactivating it.
When you have deactivated your Facebook account, other users won’t be able to search for you or see your profile.
Keep in mind that some information remains, such as messages sent by you. Facebook stores your account information just in case you decide to reactive your account.
But if you are sure that you want to permanently delete your Facebook account, here’s how you do it.
Note: Backup your information with Facebook’s tool that downloads data into a ZIP file. You can do this from the ‘Your Facebook Information’ page that can be found in the settings menu.
Step One
Enter your Facebook Setting page and click on the ‘Your Facebook Information’ option.
Step Two
Select the ‘Deactivation and Deletion’ opinion from the list of options.
Step Three
Next, tick the box that says ‘Permanently Delete Account’ and then select to continue. You will have to type in your password before you can continue to delete your account.
Facebook will show you a final message to inform you that you have 30 days before your account will be gone forever.
And that is all there is to it – that is how to delete Facebook from your life.
How to Deactivate Your Facebook Account
If you decide to deactivate your Facebook account instead, here is how:
Follow the same first two steps as you do to delete your Facebook account. However, to deactivate, you will simply choose the ‘deactivate’ option.
Once you’ve made your decision, you will click ‘Continue’, enter your password and continue. There you go, now you know how to deactivate your account.
How Do You Delete Facebook on a Phone?
Deleting your Facebook account from your phone is relatively easy. In fact, Facebook makes it really easy. Simply follow this link and you’ll be taken to the mobile web browser page where you can delete your account.
You will then simply have to confirm that you want to delete your account and type in your password. Then you are done and that is it – Facebook is gone.
How Can I Delete My Old Facebook Account Without Email and Password?
This is a tricky situation – you want to delete your old Facebook account but you can’t remember the old email address associated with it. And you forgot your password.
There are some ways to do this, and we hope this advice helps you. Remember, this is only if you’re sure you want to permanently delete and not simply deactivate your account.
Suggestion 1: Recover Password
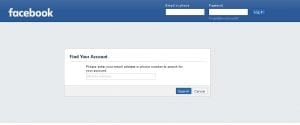
The first thing you can do is to try and recover your old Facebook password. Head over to this Facebook page and try to search for the old account.
You can enter the phone number or email used to set it up to search. Although the search screen doesn’t mention that you can use your name, you can use that too.
Depending on your security preferences, your account should show up. If you don’t see it, you can select ‘I’m not on this list’. Facebook will then ask you to enter the name of one of your friends and start searching again.
Once you’ve found your old account, you can send a reset code to any of the phone numbers or email addresses that are associated with it. Facebook will show you a redacted version of the email address you used.
However, if you don’t have access to the phone number or email address, things will be a lot more difficult.
There is another option but it’s not as simple.
Suggestion 2: Trusted Friends
Facebook allows you to select a few Trusted Friends that can help you get access to your account in case you forgot your password.
But if you didn’t set up this feature, it will be of no use to you. Very few people actually went to the trouble of setting it up.
If you did actually set up this feature, you can tell Facebook that you don’t have access to your email or phone number. Click on ‘No longer have access to these?‘.
Then, select ‘Reveal my trusted contacts’ and enter the full name of any of your Trusted Friends.
Facebook will give you a special URL which has to be accessed by all of your Trusted Friends. It contains a recovery code that will reset your account. Each of your friends will need to help you get it.
Facebook won’t contact the friends for you, that is something you need to do yourself. If there is some reason why you can’t contact these friends, there isn’t much you can do to recover the account.
If you’re reading this guide and want to be prepared, go to your Account Settings and access your Security and Login Settings. There, select between three and five friends to contact if you can’t get into your account.
Suggestion 3: Report Your Old Account
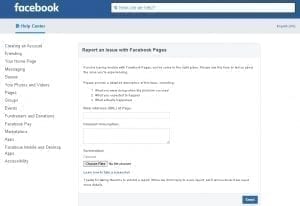
You can use a different approach and report the old account as fake. Facebook will delete the account for you if they think it’s a fake.
To report an account as fake, go to the ‘Give feedback or report this profile’ option that can be found when you click the three dots on the bottom right of the cover photo.
Select the ‘Pretending to be someone’ option and indicate ‘Me’ as who this account is impersonating.
That should be enough for Facebook to delete the account forever.
Suggestion 4: Last Resort
There is a last and rather tedious option if you didn’t have any success with the other approaches.
If you live in the EU, the GDPR gives people the right to demand that companies such as Facebook delete their personal information when requested.
If Facebook is not responding to your request to delete your account, you could take this route.
The platform also resolves disputes through a third-party company, TrustArc. However, how successful this attempt will be is unknown. You can also make use of Facebook’s Data Policy Help Center Contact form.
We hope that any of these steps help you with your Facebook deletion mission. Deleting your account can be tricky when you don’t have your old info, but fortunately, it’s not impossible.
Remember, when you have deleted your account it really cannot be undone. You have to be very sure this is what you want. There is no ‘backsies’ when it comes to account deletion.
There is no way to recover a deleted Facebook account. While your data is stored for 90 days, once that period is over, Facebook gets rid of it forever.
Also, any apps you have signed into with your Facebook account will no longer recognise you. You may quite possibly not be able to use them and will have to create new accounts or log in details. This could prove to be a tedious recovery process if the apps are important to you.
Finding a Deleted Facebook Page
If – for some reason known only to you – you want to find a deleted Facebook profile, there is a way. Of course, this won’t show you the actual profile, but a ‘cached’ version of it.
Here’s how to do it:
Step One
Here, we’ll show you how to do this using Google. Head to the search engine and type in ‘Site:Facebook.com profilename‘. You won’t be actually typing ‘profilename’ but instead the name of the deleted profile that you’re searching for.
Once you’ve hit Enter, you should be seeing the results, if there are any. Click on ‘Cached‘ so you can see the cached version of the profile.
Step Two
Now, let’s look at how you can do this search when using Yahoo! instead of Google. Once you’ve navigated there, type in ‘Site:Facebook.com profilename‘. Again, you’ll be typing in the profile name you want to find instead of ‘profilename’.
Press Enter and when the results (if any) show up, select ‘Cached‘ below the search entry to see the cached copy of the page.
Step Three
If you want to use Bing to search for a deleted profile, it is just as easy. Search for ‘Site:Facebook.com profilename‘. (Change profilename to the profile name of the account you want to see)
As with the other methods, click on ‘Cached‘ to view the cached copy of the profile.
Search engines such as Google basically takes snapshots of every single page that it examines and then caches that snapshot. This is a way of storing back-up of everything it examines. This is what Google uses to determine if a page would be a good result for your search query.
Just about every search result includes a Cached link. So, if you’re looking to find some info on a deleted Facebook profile, this method is likely your best bet.
Apart from that, there is no way to retrieve data about a Facebook account that has been deleted. Unless Mark Zuckerberg is hiding the secret from us. Even if that is the case, you’re not likely to find out anyway.
Facebook Basics – Groups

Just what is a Facebook Group? Someone who is new to Facebook might not know exactly what a Facebook group is. If you do, you can just skip ahead.
If not, we’ll briefly tell you so you can move on to the next important information – how to create a basic group.
In the shortest terms, a Facebook Group is a page on the platform that is created to let a group of people with similar interests interact with each other.
When you create a group, the name and purpose will attract like-minded people and you will be able to make new connections.
You can set a group to be private or public, depending on what you want to achieve. A private group is ideal for sharing your interests with a small group of people that you allow to join the page.
A public group can be joined by anyone who likes what it’s about.
For a business, it is all about letting people know about your business and reaching a new, wider audience.
How To Create A Facebook Group
Here are the simple steps you can follow to create the Facebook Group you want.
Step One
On your Newsfeed, head to ‘Explore’ and then click on ‘Groups’.
Step Two
Select ‘Create Group’, which you’ll find in the top right corner of your screen.
Step Three
Now, you will determine the settings of your group. You will give the group its name and edit the privacy settings.
Step Four
Your group needs to grab attention and you’ll achieve that with a good photo. This is like choosing the cover of a book, so think carefully.
Step Five
Next, you will invite people if you want. We suggest you start with people you know, if you can. This will help you build a community.
Step Six
The fun can now begin and you can create your very first post. For the best results, make it an interactive post, such as creating a poll or by asking for recommendations.
Deleting A Facebook Group
If you have created a group on Facebook but feel that it’s time to move on, you can delete it. Keep in mind that deletion is permanent and you will not be able to undo it later.
There are some alternatives that are less permanent and may be better if you’re not sure that you want to delete the group for good.
We will be looking at these alternatives first and then show you how to delete a group on Facebook if you still want to.
Change Name And Branding Of A Facebook Group
Perhaps you could consider re-branding your group if members are not as pleased with the group’s current situation.
Change the name and add branding to the cover image to make it clear what the group is about. You can also link your Facebook group to your Facebook page.
To change the group name, click on the three dots that can be found under your cover photo. Select the ‘Edit group settings’ option and decide on your new group name.
Consider also using the highest quality cover photo you possibly can. That will improve the appearance of your Facebook group.
To link the group to your page, again enter the ‘Edit group settings’ options. You’ll find ‘Linked Pages and click on ‘Link your page’. Now, choose the page you want to link your group to.
New Facebook Group Admin
It is quite possible that if you delete a Facebook group, you could offend others who put a lot of time into growing the group.
Why not hand over the group to those people rather than deleting it? You will likely know all the most active members of your group by now. If not, find them.
Make sure these members would want to take over before making them an admin. To assign new admins, click on your group’s ‘Members’ option then click on the three dots that are next to their names. Here, you can give admin rights to whomever you want.
It is good manners to pin a post that explains what is happening to the group.
Archive Your Facebook Group
If you don’t want to give admin rights to other people but don’t want to delete your Facebook group either, there is another option.
You can archive your Facebook group. This is also possible if the creator of the group has left.
When a group is archived, it will remain in-tact with threads and photos visible to all members. However, new members can’t join and the group will not appear in search results for anyone who is not a member.
Members can be blocked and deleted but the group’s description can’t be changed.
Archiving a group is reversible – a group can return to active use if it is un-archived.
To archive a group, head to the page’s settings and select the ‘Archive group’ option. It is that simple. You will have to confirm your decision.
Delete Your Facebook Group
If you have made up your mind and want to delete your Facebook group, let’s look at how to do it.
Remember, this is permanent.
Inform all the members that you will be deleting the group. This will give them a chance to download any media they want to save. Give them enough time to prepare for the deletion.
Note that only the creator of the group can delete a Facebook group. That is unless the creator left the group.
If you have a big group this is going to take a while. You have to delete every member of the group to put things to an end.
You will have to go to the ‘Members’ tab and remove each one by clicking on the three dots next to their names. Choose the ‘Remove from group’ option and do so until the last member is removed.
Then, remove yourself as a member. You will have to confirm your decision.
How Do I Delete a Group on Facebook Using An iPhone?
If you need to delete your Facebook group using the mobile app on your iPhone or Android smartphone, it’s not very complicated.
You simply head to the menu and select ‘Groups’ and ‘See All’. Then, choose ‘See All’ again under the ‘Groups you Manage’ options.
Open the group that you have decided to delete. Tap on it and then select ‘See All’ to view all of the group’s members.
As with the desktop app, you will have to manually remove every member. Finally, leave the group and confirm your decision.
You will select ‘Leave and Delete’ and the group will be deleted permanently. We recommend that you let the members know before deleting the group.
Are Members Notified When Removed from a Facebook Group?
Facebook does not notify users if they have been removed from a group. They will notice that something is up the next time they try to interact with the group though.
They won’t be able to chat or post any longer and that will be a dead giveaway that they’ve been kicked out of the group.
How Do I Remove Myself from a Facebook Group?
Getting out of a group that you no longer want to associate with is not at all difficult or complicated.
Simply find the group that you want to leave and click on the Settings option. Then, you just have to select ‘Leave Group’ and you’re all set.
Facebook Basics – Pages
Facebook Basics – How To Create A Facebook Page
You will find that you can create a page on Facebook for just about any reason. Whatever your reason, we’ll explain the process for you.
To make things easy, Facebook offers a link that will take you to the Create A Page page. From there, you can fill in all the necessary details and get right into creating your dream page.
Once you are done and satisfied, click on ‘Continue’ and follow the instructions that you’ll be given.
That is it, really. Remember that anyone can create a page on Facebook, but you have to be an official representative to create one for a business, public figure, brand or organisation.
Which brings us to our next point…
How to Delete Your Facebook Page
Many Facebook users start pages because they are fans of a star and want to show that love online. Others start a personal business page that doesn’t grow as expected.
Often, it becomes necessary to delete a Facebook page that is no longer important or relevant.
Setting up a Facebook Page is easy, and getting rid of them is just as simple. Before we get into deleting a Facebook Page, let’s briefly look at how to create one (just in case you didn’t know).
How To Create A Facebook Page For A Business
We will assume that you have a Facebook account and that you’re already in possession of some great media and content that you want to share on Facebook.
To create a successful Facebook Page for a business, you have to do a lot of planning. Check out our best time to post on Facebook comprehensive guide for more on this.
Your personal details will not be shared on your business page.
Step One
Firstly, you will select the kind of page you want to create – in this case business.
After that, you will be expected to enter information about your business. It goes without saying that the name of the page will be the same as the name of your business.
This simplifies things when people search for you.
Step Two
Select the category of your business. If your business really falls into multiple categories, choose the one that is most relevant. Choose the category that first comes to mind for your customers.
Step Three
Enter more details about your business, such as contact numbers and address. You can also decide whether or not to make this information public.
Step Four
At this point, you will have to give your Business Page a profile picture and choose cover images.
Make sure your images are related to your business (logo) and that it is of very high quality.
Remember that the cover image is very prominent so choose this one carefully.
Step Five
Your username is next and this is also referred to as your vanity URL. It is how a page tells people how to find it on the platform.
It can be up to 50 characters long but keep it short and sweet. Obviously, your business name would be a great idea.
Step Six
You can now enter more details about your business. We suggest that you add as much information as you can.
This is what people will see when they view your page and it should tell them exactly what they need to know about your business.
Now, we can get into deleting pages. Just remember that only the creator of a page can delete it – if it’s not your page you won’t be able to remove it.
But if you’ve ever wondered “how do I permanently delete my Facebook page?”, you’re in the right place.
As with the rest of this guide, we lead you in the process with easy-to-follow steps.
Step One
You will have to head to the page that you want to delete. Then, click on the ‘Settings’ option.
Step Two
Scroll through the options that are given in the ‘General Tabs’ and find ‘Remove Page’.
Step Three
Now, simply click on ‘Delete’ and confirm your decision.
That is all there is and that is how to delete your Facebook page. Keep in mind that it takes Facebook up to 14 days to delete a page.
How Do I Delete My Business Facebook Page?
Many marketing strategies require the creation of a basic Business Page. However, not all of us are cut out to run a business and may no longer need such a page.
It is possible that you just have too much going on at the moment and don’t have time to run a business and its page.
In that case, you don’t have to delete the page. Instead, unpublish the business page and come back to it when you have time again.
When you unpublish a page, it is no longer visible to other Facebook users and the public.
Remember, you can only unpublish or delete a Facebook Business Page if you are the administrator.
Unpublish Your Facebook Business Page
Once you have created your business page, it is automatically published. If you’re still working on it or want to keep it on the back-burner, unpublishing is the way to go.
It is also a good idea to unpublish a page that needs to be updated or edited for whatever reason.
Step One
Enter the ‘Settings’ menu of your Facebook Business Page.
Step Two
Select the ‘Page Visibility’ option that should be in the top spot of the settings list in your ‘General’ tab.
Step Three
Choose the ‘Page Unpublished’ option to unpublish the chosen page. Then, click ‘Save’ and your page will no longer be viewable.
When you want to publish your page again, all you have to do is come back to these settings and change the visibility of your page to ‘Page Published’.
It really is as simple as that.
How To Permanently Delete A Facebook Business Page
Before you go ahead and delete your business page, remember that this is not an action that can be reversed.
Also, Facebook won’t go the extra mile and for, example, let you know about the decision with an email.
So, think carefully before moving ahead with the removal.
If you’ve made up your mind, here’s what you do:
Step One
Go to your Facebook Business Pages’ settings menu.
Step Two
Scroll until you find the ‘Remove Page’ option and click on the ‘Edit’ button that is next to the ‘Delete Your Page’ option.
Step Three
Now, click on ‘Permanently Delete’ and your page will be deleted. Of course, you will have to confirm your decision.
Once you have chosen to permanently delete your Facebook Business Page, the removal will be scheduled.
It may take up to two weeks before the page is permanently deleted. During this time, it is possible to cancel the process. So, if you have second thoughts and aren’t sure you want to delete a Facebook page, this is your chance to reverse the deletion.
Simply go to your page and click on the ‘Cancel Deletion’ option that you should find at the top of the page.
When the 14-day period has passed, you can no longer recover the page in question. Now you know how to delete a Facebook page.
How To Recover a Facebook Page
Sadly, in this day and age with hackers, spiteful people and even technological failures (they happen!), it is important to know how to recover a Facebook page.
If your personal or Business Page is in the hands of someone else, you might want to have the assurance that you can still get back control.
There are many reasons why you may have to regain control of your Facebook page. It could be that an angry admin deleted you and now you’re no longer calling the shots.
Perhaps you didn’t create the page but the previous owner is long gone and not responding to your messages.
Sometimes, a page is created automatically when enough people ‘check-in’ and leave reviews. If that happened to your business, you may want to get things to look more professional.
Whatever the reason, Facebook knows that this could be an issue for some of its users. As such, they have provided a solution.
And it won’t take forever either!
All you have to do is head over to this link, explain the matter and give all the relevant details and wait for a reply.
This could take anything between a few hours and a few days. You may have to be a bit patient, but usually, waiting doesn’t take that long.
However, if you haven’t received a response within about three days, send your email again.
That is all you need to do if you need to get back control of your Facebook page.
If that doesn’t work (it should though), you will have to contact Facebook and inform them that someone is making unauthorized use of your intellectual property on their platform.
This might take some time to resolve and you will likely have to prove that the page is yours.
Facebook Basics: Bonus Tips On Using the Platform
If you are new to Facebook, you likely don’t want to advertise the fact. So we decided to share some advice on how to use the platform like a seasoned user.
Facebook Basics Warning: Never Share Personal Info
Many beginners make the mistake of oversharing on Facebook and that is not recommended. You do not have to fill in your About page until it overflows.
Instead, look at Facebook as a fancy phonebook. Communicate with your friends and share some memories.
But don’t just share information that you won’t be okay with total strangers knowing.
Facebook Ads
Make sure that you edit your Facebook Ads preferences to avoid your information being shared.
You can’t stop the platform from collecting your data but you can put a restriction on how that data is used.
Head to your Settings and enter the ‘Ads’ options. Then, select ‘Ad Settings’ and make adjustments as you see fit.
Restrict Access To Your Profile
You want to restrict access to your Facebook profile so strangers can’t see what you’re up to.
The default setting allows anyone with access to the internet to view your posts. Your profile will also be displayed in search engine results.
We suggest that unless you like unwanted attention, you go and change your privacy settings as soon as you set up your account.
Head to your ‘Account Settings’ and choose the ‘Privacy’ option. Change who can see your posts and if you want search engines to link to your profile. This will help with how your posts are seen on the Facebook newsfeed of other users you’re friends with.
Make changes to any other settings that you are not comfortable with.
Organise Your Friends List
Some Facebook users don’t realise this, but they can organise their friends into lists. This will make your experience on the platform much more convenient.
Facebook gives you a convenient tool to keep things organised. You can create groups by clicking on the ‘Friend List’ on the left side of your screen.
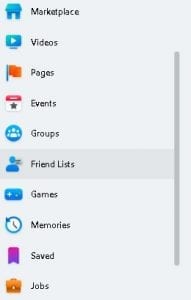
You can create lists based on the companies you’ve worked for, places you’ve lived or even create your own custom lists.
Once you’ve done that, you will see a feed of posts from the people who are in your list by clicking on said list.
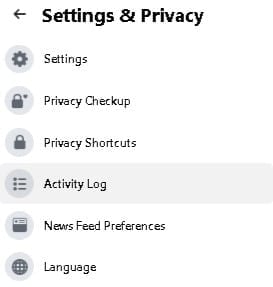
Activity Log
We suggest that you familiarise yourself with the Activity Log on Facebook. It is a record of all your activity, as the name suggests.
You can manage and review everything that you have shared. Also, it is possible to unfriend people, change where your posts are visible, delete old posts and more.
To access your Activity Log, head to your Settings Menu and you’ll find it easily.
Final Thoughts on Facebook Basics
There you have it – a thorough guide on how to use Facebook. You can now make the most of this hugely popular social media platform with a good basic understanding.
You now know how to unblock someone on Facebook, how to delete a Facebook group, how to change your name on Facebook, how to delete a Facebook page and more.
One can say that you know the Facebook basics and ‘how to Facebook’. It is now possible for you to become quite the master on Facebook and all its features.
Our social media marketing blog covers all things social media marketing! Including Instagram topics such as how to do an instagram audit and instagram giveaways. We’re always updating our blog with valuable social media marketing content so make sure you come back regularly for even more!